https://www.youtube.com/watch?v=Lk_v6Q0YsNo There are several reasons why you would want to make a VPN.
- You know who has your data, and what they do with it
- You connect to a safer network
- You are not banned when trying to connect to an online VPN IP filtering game
VPN Protocol
We must choose the VPN protocol we want to use first and foremost. https://www.ivpn.net/pptp-vs-ipsec-ikev2-vs-openvpn-vs-wireguard/ For us, we have 4 choices that have good support.
- PPTP
- IPSec IKEv2
- OpenVPN
- WireGuard
Wireguard is the most secure, but it is not runnable on linux unfortunately. We will use OpenVPN.
Setting up security on Debian
VPN Account
Simply create an account on the OS.
Make account
su -
useradd -m [username]
passwd [username]
Wheel group
Then add them to the wheel group
To make the wheel group, first type: groupadd wheel
Then add them usermod -G wheel [username]
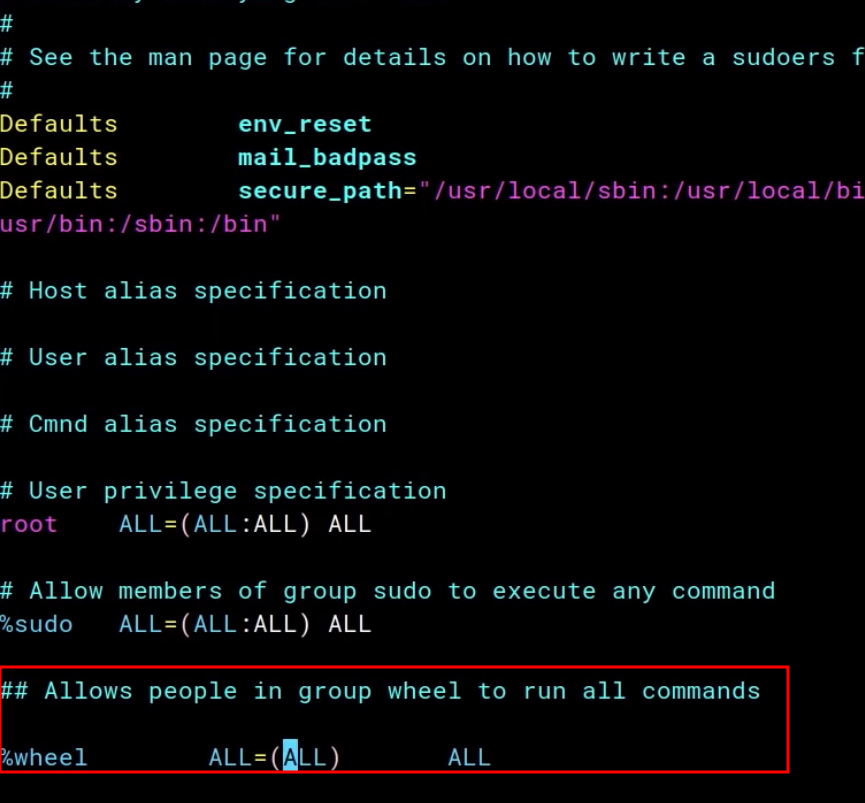
finally, go to edit /etc/sudoers file
vim /etc/sudoers
and add the following lines:
 Ok save it with
 w! and then quit q!
Enter the new account
to enter the new account, type su [username]
and then enter the home directory: cd ~
SSH Keys
Enter you client machine. Linux machine, or use WSL.
Making .ssh
https://stackoverflow.com/questions/15190391/ssh-directory-not-being-created
If you have not ssh into another computer on this computer before, then you will have to make your own .ssh folder. it is very simple. go to your home directory and make a .ssh folder
mkdir ~/.ssh
and also,
chmod 700 ~/.ssh
Keygen
enter the .ssh directory
cd .ssh
we are making an rsa key with 4096 bits.
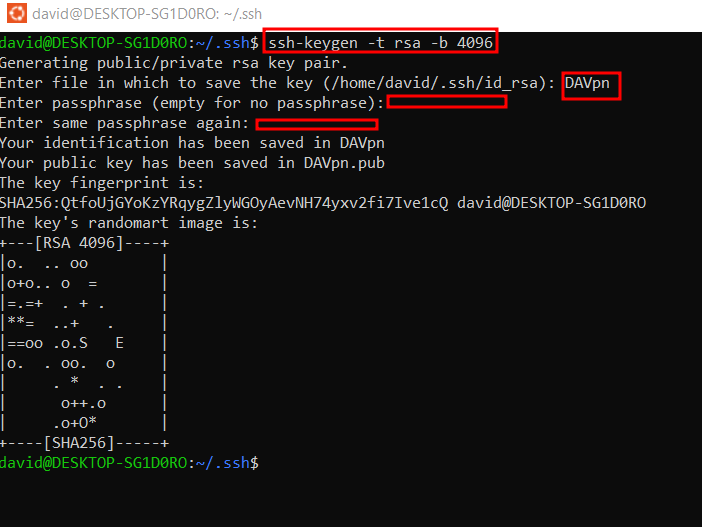 Recommended to give your vpn file a name. in my case it is DAVpn.
*.pub
ls -a
 We need to copy this to our Remote VPN
SSH test
to do this, we need to be able to ssh into it first. do a quick test of ssh into it
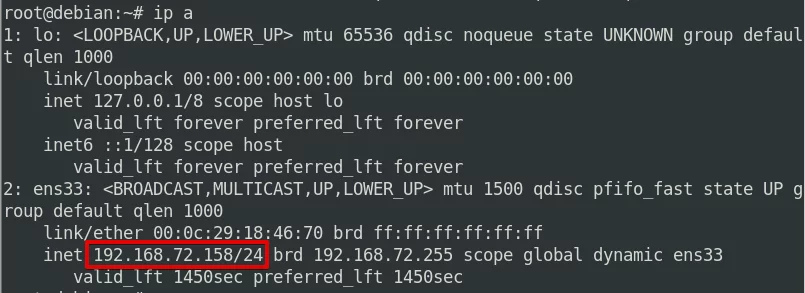
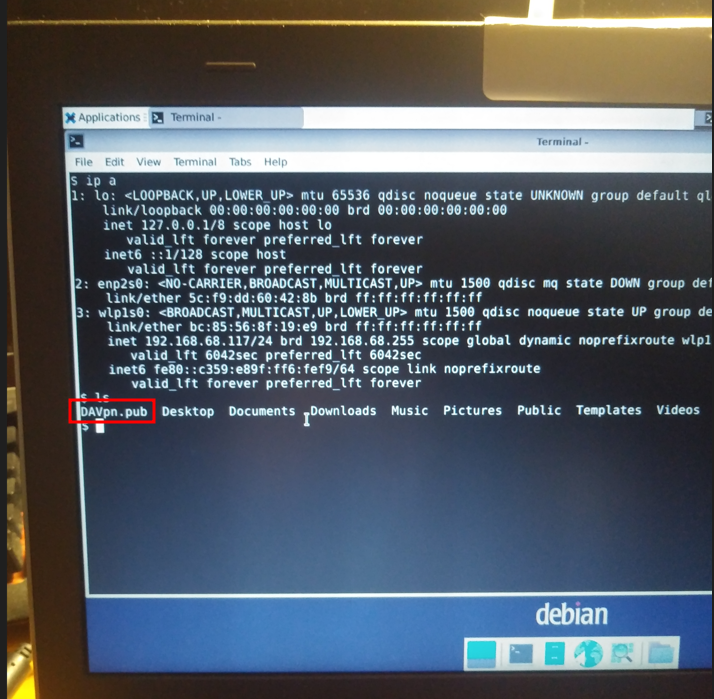
On your VPN machine, type: ip a
and then locate the text after ‘inet’. that will be your IP.
Back on your client machine, try and ssh into your VPN.
ssh [username]@[ip]
for me, i did:
 If SSH test works, then you can securely copy a file to it.
Secure copy
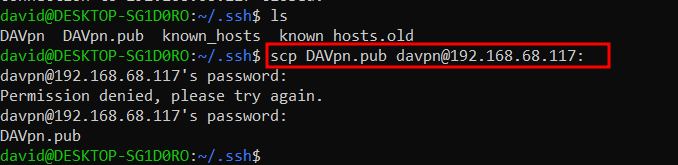
scp [pubfile] [username]@[ip]:
make sure to have the colon at the end.
Now, if I ls in the VPN machine, I can see the .pub file.
VPN Machine SSH setup
Make sure you also make a .ssh folder on the VPN machine as well. with permissions 700.
And then, make a authorized_keys file in the .ssh directory.
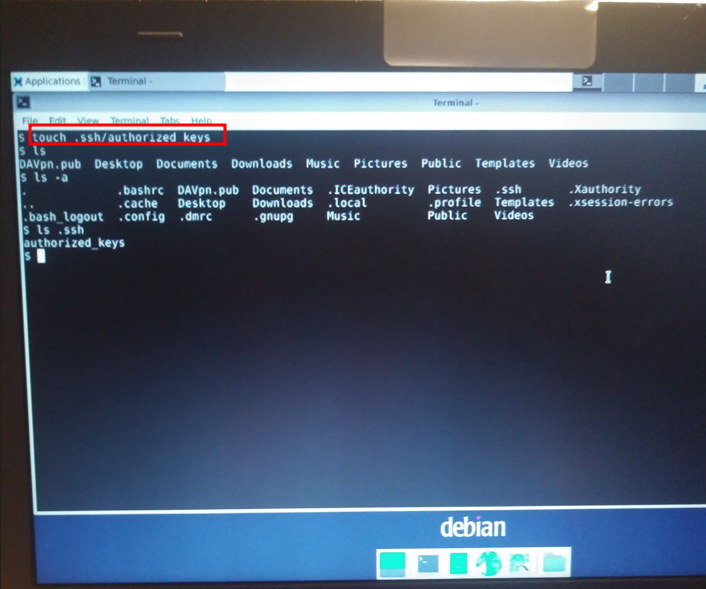
touch ~/.ssh/authorized keys
and then pipe your .pub file into that new file you made.

cat [.pubfile] >> ~/.ssh/authorized_keys
And then, lets edit the configs of our sshdconfig.
 With great power comes great responsibility
We are surgeons. This is the task:
With great power comes great responsibility
We are surgeons. This is the task:
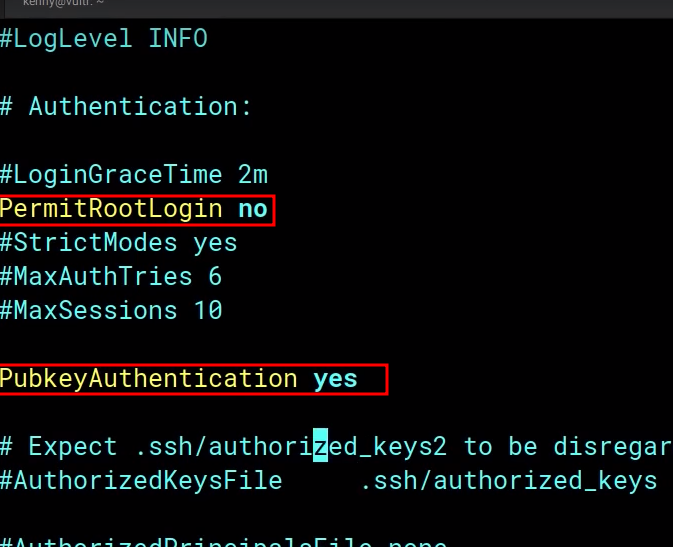


PermitRootLogin no
PubkeyAuthentication yes
PasswordAuthenticaton no
AuthorizedKeysFile .ssh/authorized_keys .ssh/authorized_keys2
we disable password authentication as clear text passwords. we want maximum security.
You can also change the port. the default ssh port is 22. we like that, leave it as is.
now we restart the sshd
sudo systemctl restart sshd
sudo reboot
ssh into the vpn on the Client machine.
 you will need the ssh file this time
Making the VPN
we are using OpenVPN.

sudo apt install openvpn
We will use an install script for openvpn.
https://raw.githubusercontent.com/angristan/openvpn-install/master/openvpn-install.sh
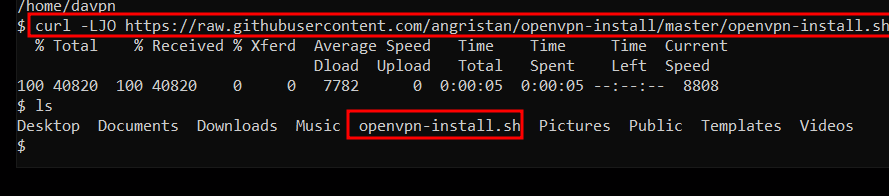
in our ssh’ed session, or you could just do this on the VPN machine itself, you use curl commands to download.
curl -LJO https://raw.githubusercontent.com/angristan/openvpn-install/master/openvpn-install.sh
chmod +x openvpn-install.sh
and then run the script as root
sudo ./openvpn-install.sh
I used all the default settings.
my client name is desktop and its passwordless.
 \
\
No log VPN
We dont want to store logs.

sudo vim /etc/openvpn/server.conf
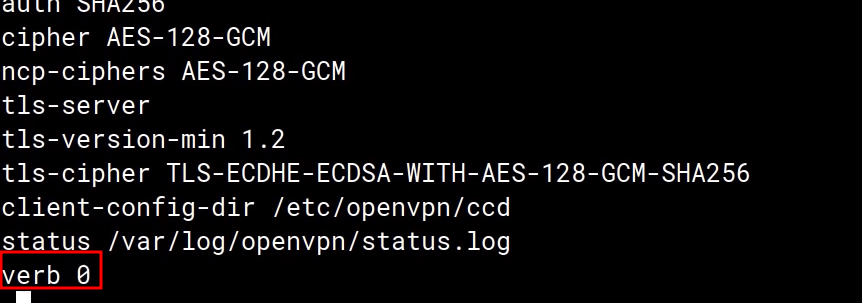 change verb 3 to verb 0
and finally restart the service
sudo systemctl restart openvpn
Download .ovpn file
 so we are on the client machine. instead of ssh, we are sftp to connect into it.
same sort of deal, you dont need to colon to connect now tho.
To download this,
so we are on the client machine. instead of ssh, we are sftp to connect into it.
same sort of deal, you dont need to colon to connect now tho.
To download this,

get [clientname].ovpn
ok, exit out of this session back into the client machine
install openvpn on the client machine too.

Connection

sudo openvpn --config desktop.ovpn
Now, this is only for my WSL. I cant even change my ip on actual windows. the IP for the WSL and the actual windows machine is different.